Larson 14808 Midview Easy Vent Screen Away Door Instructions
Liz grew up as a "grease monkey" to her father, who taught her to fix and work with many things. She also enjoys watching auto races.
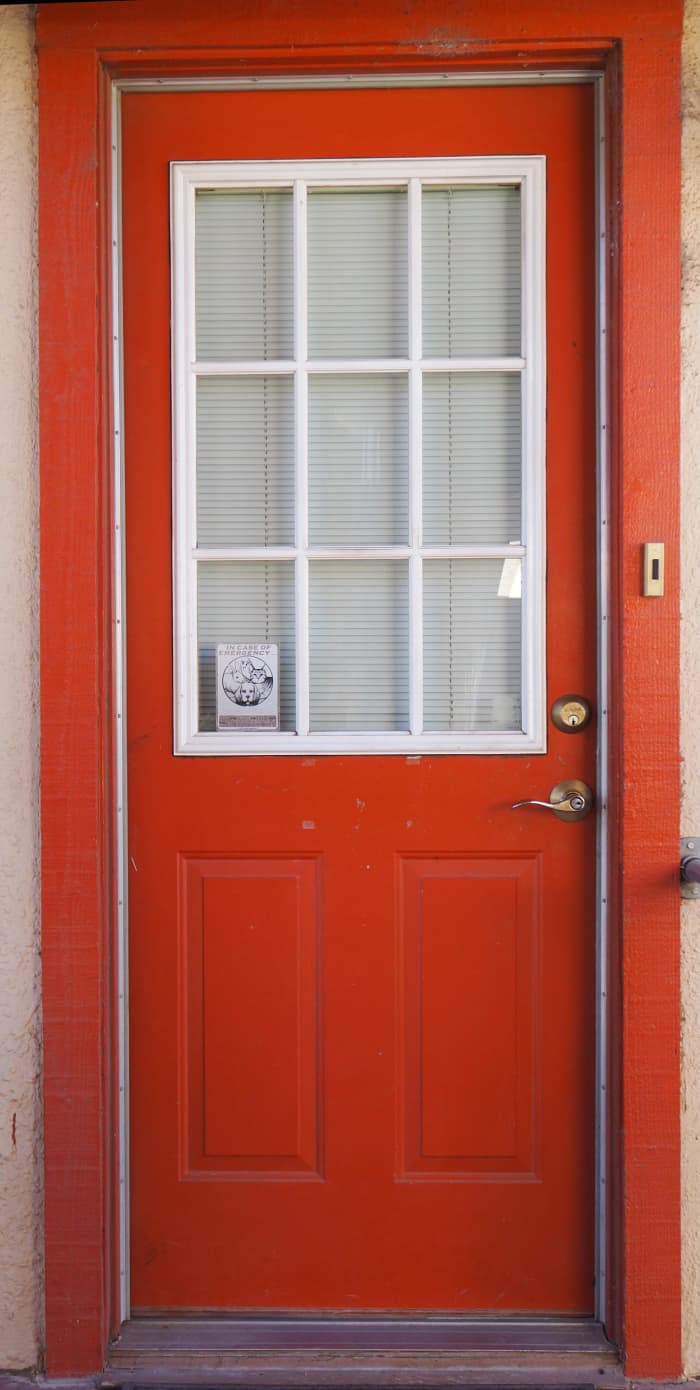
No screen door--yet
Begin at the Beginning
That might seem so obvious as to be a foolish statement, but you would be very surprised at how many people try to jump into a project without considering the basics.
The very first thing you need to do is measure the doorway opening where you want the screen door to be installed. Be very careful with this measurement. You need to measure the width of the inside edge of the opening, on the outside of the blind stop.
Next, measure the height of the opening, from the outside edge of the blind stop down to the threshold. You can do this alone, but it is easier with a helper to hold one end of the tape measure. If you have a helper who doesn't know how to read a tape, give them the "dummy" end. That's the end with the hook for catching the tape to the end of a board or onto a nail.
With these measurements, you are now ready to purchase your screen door. There are so many options, I won't go into it all here. The installation is pretty much the same in any case.
Which Way Do You Want It to Open?
Do you want a left or right hand swing? Remember, the screen door will open outward away from your house. Conventionally, screen doors are hung with the hinges on the same side as the ones on the door to the house.
However, you may have some reason for wanting your screen to swing the other way.
Right? Left? Here's how you tell: stand with your back against the hinge side of the door frame. Which hand is nearest the doorknob? That is the side you call the swing.
So, in my house, the door opening into the house is a left-hand swing, and my screen door is a right-hand swing. This puts both knobs/latches on the same side, as well as matching-sided hinges.
Some screen doors are pre-assembled, and you must choose. But I found that the majority of the selections were reversible designs, meaning there are components that can be switched from one side to the other as needed.
At the Store
Don't forget to bring your measurements! If you are shopping at one of the big self-serve warehouse type stores, there will be rows of many types, styles, and sizes of screen doors all in racks to hold them from falling over.
Choose a design you like, and then check to see if it comes in a size that matches your measurements. Keep in mind, there is usually a little bit of "wiggle room." The packaging might say, "nominal size 80 inches x 30 inches," but it will allow for adjusting the door from, as was the case with mine, from 79 inches tall and up to 31-3/4 inches wide.
This is important, because there are so many variations in house door sizes and styles (despite certain 'standard sizes,'), that it is nearly impossible to get a perfect fit unless you want to shell out the money for a custom-made door. In that case, you're probably also having it professionally installed, and have no need of this article.
Once you have selected the door you want, check the packaging, to make sure it's not ripped open, which could mean missing parts.
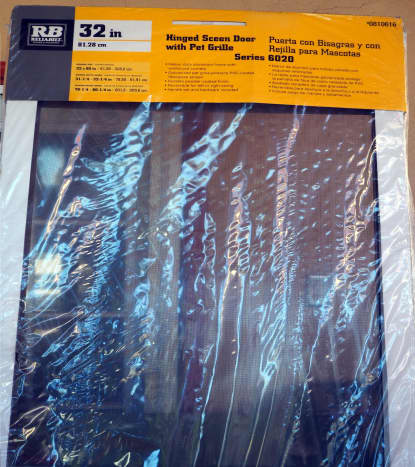


Most doors at self-serve warehouse stores are packaged similarly to this
Scroll to Continue
Read More From Dengarden
Once You Arrive Home
Now the fun begins. Carefully take off the over-wrap, and the cardboard protecting the top, bottom and side edges. Be careful; the parts you need will be tucked inside one of these areas, so check that you don't miss any.
I suggest opening up the plastic all the way, and laying it on the ground, so you can lay out your door without scratching the paint. Next, open the parts bag or bags, and check all the pieces against the instruction sheet to be sure that:
- nothing is missing
- familiarize yourself with the bits that will be needed at various stages
Read the Instructions
Yes, read the instructions! Read them all the way through.
Then read them again.
You want to be sure you understand the proper sequence of all the steps to achieve a successful and good-looking installation.
As you work, it is helpful to make a check mark by each completed step, so you don't lose your place, or miss an important item.
Note: somewhere within the instructions will be a small printed template to be used for placing the handle and latch; you will cut it out and apply it to the doorframe as well as the screen. Do not lose this little slip of paper!
| Tape Measure | Hammer | Center Punch (not pictured) |
| Drill Driver | Drill Bits | Screwdriver Bits |
| Hacksaw | Scissors | Utility Knife |
| Pencil | Combination Square | Parts Tray (optional) |


Ready? Begin!
First, you will need to do any adjustments in the size of the door; the side and bottom panels are normally where these adjustments are made. If you need less width, as I did, you will cut off a portion of the top and bottom frame rails. (See photos.)
Once you have the correct size, you will screw the pieces into their permanent positions. This is where the old adage of "measure twice, cut once" comes into play.
In addition to making cuts, you'll also be making permanent screw holes in your door, to fasten these panels into place. You will also be drilling holes in the upright side panels, where the width adjustment takes place.
This is where the center punch comes in; you hammer it against the panel where the screw will go, and it makes an indentation, helping to keep the drill bit from slipping out of position as you begin to drill for the screw holes.
If your door comes with a rubber 'sweep' for the bottom (helps with keeping dirt and drafts out), you will install that just before you hang the door.
Next, you will trial-fit the door into position, paying attention to the hinge side, to make sure it is going to open the way you want it to. Most screen doors do have dedicated inside and outside faces, so make sure you get it right way around.
For example, I chose a door with a solid bottom and a metal grid on the bottom inside half; this is to allow my cats to look out, without being able to get their claws into the actual screen. Therefore, the 'soft' side with the exposed screening goes on the outside.

You will probably only do one of the side adjustments before installing the door; the other side will be done after you have attached the door with the hinges, and then you fine-tune the opposite side, screwing in the overlay panel as you work, top to bottom.
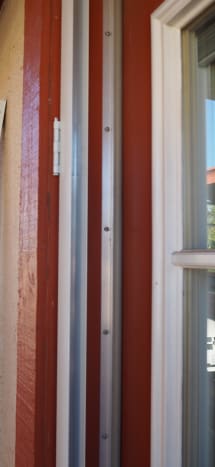
The Sides
You will start by mounting the hinge panel to the door frame of the house. This panel is not yet fastened to the screen door; it will slide right off. Here is where you will decide on which side you want your hinges, and which way out the door will swing.
This is also the start of where you will make any width adjustments. Once the hinge panel is fastened in place, you will slide the screen door back into the panel. Adjust from side to side until you have a reasonable tiny gap on each side. You want it as even as possible; don't try to make the full width adjustment from one side only. It will look weird, and your door might bind, as well.
The final width adjustment will be made on the latch side of the door, and you'll have to keep tweaking it from top to bottom, as you screw in each successive screw. It helps to have an assistant for this part of the job. I did not, but it is doable if you're alone with the project.


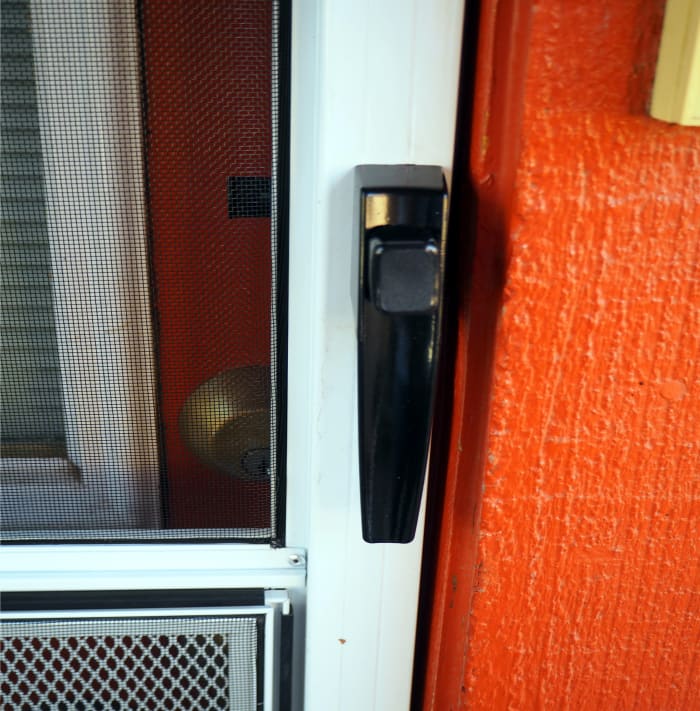
The Latch and Handle
This is where the job can get a little bit scary or intimidating. You will need to drill 3 fairly sizeable holes into one side of your brand-new screen door!
Read and re-read the directions for this part again, if you are at all unsure.
Be sure, when using the template to line up where your latch and handle go, that the position will not interfere with the doorknob or latch handle on the door to your house.
You need to put together the latch assembly itself. Be careful! There is a small spring that goes inside, and you don't want it to get lost! Without the spring, the latch will not work.
The Sweep
Most doors will come with a rubber 'sweeper,' which fits into the bottom panel, shown above being cut to width.
The sweep slides into a channel on the metal panel, and it, too, must be cut to match the final width of the metal piece.
The purpose of the sweep is to help keep dirt and debris from coming in under the door. It may need to be trimmed to an appropriate height as well as width, once it is installed. If the sweep is too tall, it may drag on the threshold of the doorway, and cause binding.
Halfway Done!
At this point, with the door installed and adjusted, it is time to put the latch and handle in place on the door. This is not done at the factory, so you are able to place it where it does not interfere with the doorknob or latch lever on your house door (again, nothing here is standardized).
Using your template (remember that little slip of paper you cut out), mark where it is going to fit, and using the combination square, transfer the marks to the door jamb, where the door latch will meet up with the jamb side latch portion, to fasten the door closed.
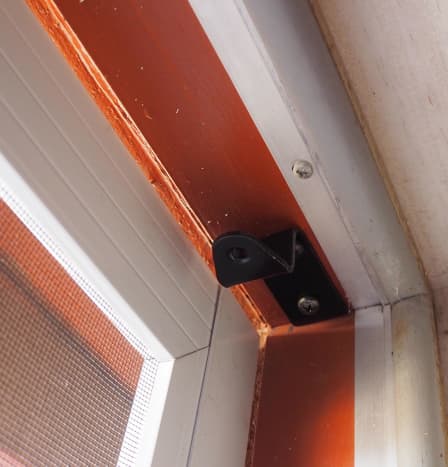
The Door Closer
Most screen doors come with an automatic door closer, which is a small hydraulic cylinder and plunger assembly. One part fastens into a bracket screwed to the door jamb (the jamb bracket); the other side attaches to the screen door itself.
The purpose of this device is threefold. First, it holds the door from slamming open and damaging the hinges if it is windy. If kids are running in and out: it slowly closes the door automatically, so it doesn't get slammed shut.
Both of these functions act to protect and lengthen the life of the screen door. The third attribute is a metal stopper, which can be moved up against the cylinder, to hold the door open if needed, for example, when bringing in a lot of groceries, or for a furniture delivery.
All Done!
With the door closer installed, you are done! Congratulations! You've just installed a screen door all by yourself!
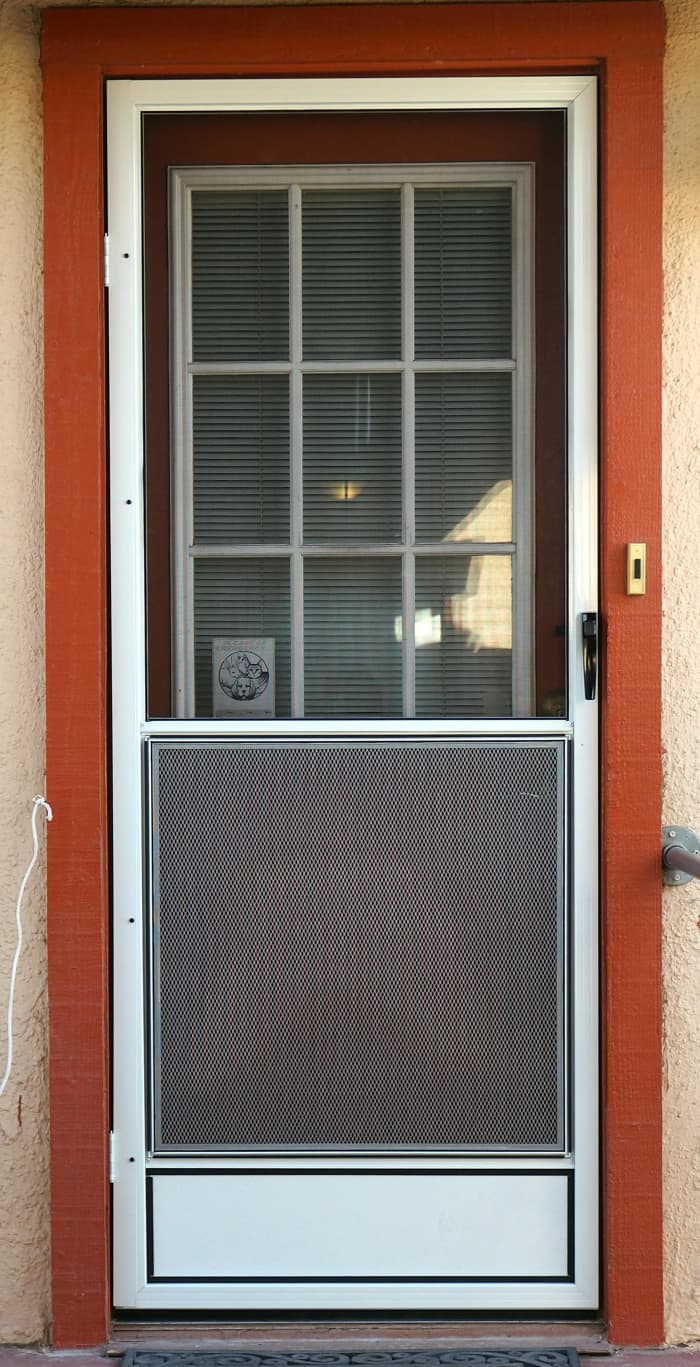
You will notice a gap at the right side of the screen, between the doorframe and the screen door; this is because the house itself is out of square. A level placed on the mid-bar of the screen showed it to be installed perfectly straight and level!
This article is accurate and true to the best of the author's knowledge. Content is for informational or entertainment purposes only and does not substitute for personal counsel or professional advice in business, financial, legal, or technical matters.
© 2018 Liz Elias
Liz Elias (author) from Oakley, CA on December 17, 2018:
Thanks, Shauna!
I've always enjoyed DIY projects, and figuring things out for myself. I've been known to "McGuyver" things from time to time as well. ;-)
As I say in my bio, I grew up grease-monkeying to my dad, and I know my way around a tool box. In fact, I was mad because I wanted to take auto shop in high school, but they wouldn't let me because I was a girl! Pfft! Nowadays, girls can take it, but back in the dinosaur days when I was in school, not at all.
Shauna L Bowling from Central Florida on December 17, 2018:
Liz, you certainly are a talented woman! I wouldn't even attempt a project like this on my own. I'd have my neighbor, who installs doors for a living, do it for me.
Good on ya, girl!
Liz Elias (author) from Oakley, CA on December 16, 2018:
Hi Bill--I, too, am amazed that in your vast collection of experiences, you've missed out on hanging a screen door! LOL Glad you liked the article.
Hi Liz--A screen door has a couple of main functions. First of all, in the summer, it lets you leave your main door open for fresh air, while keeping bugs out. Secondly, as in our case,it keeps your pets from escaping. (Our cats are indoor-only spoiled kitties.)
We do have screens on our windows, but the way the house is configured, they are awkward to access around the furniture, and there really aren't any better ways to place the furniture.
Liz Westwood from UK on December 16, 2018:
I am not familiar with screen doors in the UK. What are their purpose? As someone who has carried out a few basic DIY projects in the past, I can see that you give a thorough step by step installation guide here.
Bill Holland from Olympia, WA on December 15, 2018:
You know, Liz, I do a ton of DIY here at our house and out at the farm, but oddly I don't think I've ever hung a screen door. I'm wondering now how that is even possible? lol Thanks for the primer!
Source: https://dengarden.com/home-improvement/How-To-Install-a-Screen-Door
0 Response to "Larson 14808 Midview Easy Vent Screen Away Door Instructions"
Enregistrer un commentaire